Into the Darkness, Go I: Difference between revisions
Nicesociety (talk | contribs) |
Nicesociety (talk | contribs) |
||
| Line 88: | Line 88: | ||
However, Saleke had a trick up his sleeve. Earlier, he had ordered the modification of five quantum torpedoes so that they were equipped with a [[Cloaking device|Phased Claoking Device]]. These torpedoes when launched against the Rosenante ignored her shileds and caused significant damage to the latter vessel's Environmental Subsystems, lifeboats, secondary phaser array, forward tractor beam emitter and caused a hull breach in main Engineering. The advantage was short lived however, when Salid managed to deplete the Furious' forward shields enough to cause the vessel to veer off in order to avoid a volley of concussive photon torpedoes. | However, Saleke had a trick up his sleeve. Earlier, he had ordered the modification of five quantum torpedoes so that they were equipped with a [[Cloaking device|Phased Claoking Device]]. These torpedoes when launched against the Rosenante ignored her shileds and caused significant damage to the latter vessel's Environmental Subsystems, lifeboats, secondary phaser array, forward tractor beam emitter and caused a hull breach in main Engineering. The advantage was short lived however, when Salid managed to deplete the Furious' forward shields enough to cause the vessel to veer off in order to avoid a volley of concussive photon torpedoes. | ||
It was a manuever that would later become known as [[The Salid Gambit]]. With the | It was a manuever that would later become known as [[The Salid Gambit]]. With the Furious deviated from her pursuit. Salid managed to get the Rosenante into the [[Magnesite]] ore filled asteroid field in the Bardon system known as [[The Mill]]. It was an area familiar to Lieutenant Raschen, who had often used the area to avoid or lose [[Cardassian]] pursuit during the [[Cardassian]]-[[Federation]] War. Raschen had served in the [[Irregular Federation Forces]] during the [[Admiral Doenitz|Doentiz]] regieme, before defecting to the [[52nd Fleet]]. His knowledge of the area would prove invaluable to evading the Furious. The high concentration of magnesite ore prevented the use of most navigational sensors withn the confines of the Mill, thus preventing the furious from following the Rosenante. in addition, coupled with the [[The Chimera Directive|HISS]] Stealth System, the Furious was unable to detect the Rosenante from outside the field either. | ||
Saleke ordered the Furious at best speed course around the field in the hopes of catching the Rosenante exitting the other side in the hopes of taking advantage of the Prometheus Class' Tri-vector assault mode. However, once on the other side, the furious detected the decaying signature left by the [[The Chimera Directive|Spiral warp Drive]] of the [[ISS Rosenante]]. | Saleke ordered the Furious at best speed course around the field in the hopes of catching the Rosenante exitting the other side in the hopes of taking advantage of the Prometheus Class' Tri-vector assault mode. However, once on the other side, the furious detected the decaying signature left by the [[The Chimera Directive|Spiral warp Drive]] of the [[ISS Rosenante]]. | ||
Revision as of 17:53, 22 May 2009
Coming Soon!
The ISS Rosenante is assigned by Regent Doenitz to travel to the Sunali system. Earlier in 2407 the Sunali people defected to the invading Klingon-Cardassian Alliance. The system did not put up any resistance to the invaders and as such Doenitz feared that the other members of the newly formed Imperial Union of Planets would consider following suit. This action of course would lead to the complete defeat of the IUP. With this in mind the ISS Rosenante was dispatched to make an example of the Sunali.
By the time that the Rosenante arrived The Klingon-Cardassian Alliance had already begun shifting a large task force into the system. This task force was preparing for a military attack into the heart of the IUP.
The enemy vessel present in the system were:
Twenty-two Klingon ships:
- 12 K'Vort Class, Bird-of-Preys
- 6 B'rel Class Bird-of-Preys
- 4 modified D7 Class Battle Cruiser.
There are also Cardassian starships in the system.
- 18 Galor Class
On the Planet, Sunali II there was a population of 18 million inhabitants.
The ISS Rosenante moved into position by passing the mine perimeter that was only partially completed by the Cardassians. The ship them activated and launched the Omega Device towards the Sunali Star.
The Rosenante then turned, and fought it's way pasts several enemy ships and was just barely able to escape the system just as the Omega Device detonated. The resultant explosion destroyed the entire system along with the enemy task force. An unexpected side affect of the Omega affect was an interaction of the energy waves created by the Omega Molecule's destruction interacting with the Spiral Warp Drive of the Rosenante. Somehow this interaction forced the Mirror Universe ISS Rosenante through an Interphasic Tunnel which deposited it into the Prime Universe, just outside the Sunali System.
Act II: Prologue
Unknown to the USS Rosenante their mirror counterpart has laid in a course to Bardon Alpha. The Rosenante's Captain Ahmed Ibn Salid holds an emergency meeting with his three senior most officers, Jennifer Caskie, T'Larah Sullivan and Jon Nayati. He explains to them that he has just order the USS Rosenante off mission to investigate some critical intelligence. He does not reveal to the the nature of this intelligence, but simply asks for their trust in this issue. Salid states that he is aware that he is breaking regulations and that he realizes that there will be consequences if he is proven to be wrong. However he states that he can not take the chance that the intelligence turns out to be accurate without investigating it. It is his belief that the intelligence he has received could threaten not only the United Federation of Planets but also the Alpha Quadrant. All three officers agree to trust Salid's judgment.
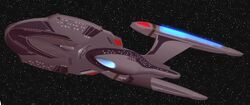
Meanwhile back on Earth, Captain Saleke, former Commanding Officer of the USS Hades is called to a lunch with Vice Admiral Errol Heatherby. The admiral begins to explain that he has reason to belie that there may be a conspiracy inside the Admiralty. He cites the bizarre fact that several prior Doenitz supporters are now Starship captains in the border region between the United Federation of Planets and the Cardassian Union. fearing that there could well be a potential to allow conspiracy to thrive under such conditions, he orders Saleke to take command of the USS Furious, a Prometheus Class starship and proceed to the Ikev Sector. He also warns Saleke that the previous Captain of the Furious was killed in a freak Transporter accident and that the Vulcan Captain should proceed with caution.
Act III: Bardon Alpha
The Attack
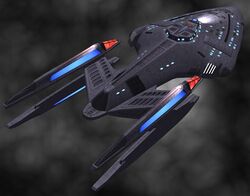
The ISS Rosenante arrived at the Bardon mining Facility with the intention of stealing a shipment of highly refined Boronite ore. Captain Salid opened a channel and demanded that the ore be turned over to them. When the facilities administrator, Alix Sorvex, declined, Salid ordered the facility attacked and all personnel except one killed. He ordered an away team to the surface to carry out his orders.
The Assualt team was lead by the Mirror Universe version of Jennifer Caskie. Other members of the Mirror Universe crew, including Mike Rosenbauer and Aleesa Wyler accompanied her. Rosenbauer commanded a security team called Mike's Maniacs, which consisted of Mirror Universe versions of Sodra, Tyrone Cooper, Mosh, T'Vyr and Eva Saint-Jean. There were also two disposable members of the ISS Rosenante's Science team sent along to locate the boronite. once theier job was completed, they were executed and their bodies left behind.
During the raid, Jennifer Caskie murdered the administrator with a bladed-weapon, which seemed to be the preferred method of execution. All other members of the facility crew were killed with the execption of technician Dallas, who was seriously injured by Mike Rosenbauer, and Talia Lorenzo who had managed to avoid detection by hiding inside the facility's computer core venailation system.
The Distress Signal
While enroute to the Ikev Sector the USS Rosenante intercepted a distress communication from the Bardon Alpha Mining Facility. Captain Salid ordered an intercept course set and the Rosenante raced to respond to the signal. The signal itself was standard except for it's contents. The signal claimed that they facility was under attack by a Federation starship, which was identified as the Rosenante. This was not possible as the Rosenante was several hours away when the attack took place.
When the ship arrived at the Bardon Alpha system, they detected no ships and received no replies to their hails.
Wishing to get to the bottom of the signals claim and to search for survivors, Captain Salid ordered an away team to the planet's surface to investigate.
The away team consisted of:
- Commander Jennifer Caskie
- Lieutenant Jon Nayati
- Lieutenant Thomas Jackson
- Ensign V'Shera
- Ensign Mitena Rixx
- Ensign Robert Smith
- Ensign Sam Lopez
- Ensign M'Epak
- Ensign Kimiko Ichijo
- Ensign Mike Rosenbauer
The away team beamed into the facility and immedately broke into two teams. The first two teams began searching the area for survivors, these teams were comprised of Doctors Lopez and Ichijo as well as elements of the security team. The teams did not find any survivors on their assigned search areas but Doctor Ichijo did find a pair of bodies dressed in unusual uniforms, These two corpses were beamed back to the Rosenante for analysis. They were later discovered to belong to the two science officers from the ISS Rosenante. They had been executed by under orders from the Mirror Universe Jennifer Caskie once they had located the refined Boronite.
The second away team consisted of the operations and Engineering team. This group consisted of Lieutenant Jackson and ensigns Rixx and Smith. The team's orders were to recover tha facility's sensor logs for study. Because of the extent of the damage, this team was forced to work there way deeper into the facility until they reached the computer core. once there, they gained access to the core and began copying the data for transfer back to the ship.
The third team consisted of Commander Caskie, Lieutenant Nayati and Ensign Rosenbauer. They made thir way to the Administration center of the facility in the hiopes of accessing the facilities shipping manifests and security tapes. While there, they encountered the seriously wounded John Dallas. Dallas injured Rosenbauer, believing him to the be the same man who had assaulted him earlier. in fact that person had been the Mirror Universe version of the same man. Dallas was subdued and beamed to the Rosenante for medical treatment.
Caskie and Nayati then uncovered the production manifests and the security logs for the facility. The former showed that the facility had been refining boronite to an exceptionally refined state while the latter uncovered a video image showing Rosenbauer, Caskie and Wyler complacent in the death of the administrator and the attack on the facility.
This information coupled with the mysterious appearance of a second Rosenante class starship, which could only have been built in secret, further convinced Captain Salid that there was indeed a high-level conspiracy ongoing.
The Furious Arrives
Despite warnings that they should leave the system by his senior officers, Captain salid decided to remain at Bardon Alpha in the hopes of gathering some information that could give him a direction of pursuit.
Lieutenant Chance Raschen after reviewing the telemetry data from the facilities computers managed to extrapolate a possible course for the rogue vessel. However, before it could be pursued the USS furious arrived in the system.
The Prometheus Class starship was commanded by Captain Saleke. The Vulcan CO had once been the Commanding Officer of the USS Hades during the Federation Civil War, and was renowned for his tactical skill.
Salid was surprised to see Saleke, and suspected that if he was not a willing participant in the conspiracy concerning the creation of an Omega Device that he may well be manipulated into serving the purposes of that conspiracy. Saleke ordered the surrender of the USS Rosenante, but Salid, uncertain of the Captain's true loyalties declined and attempted to fell the scene in the hopes of exhonerating the names of the crew.
Saleke engaged the Rosenante, whom he considered attempting to escape from the scene of a crime and shot's were fired. Still reluctant to destroy the Furious due the the unknown position of Captain Saleke's affiliations, Salid ordered the long-range communications of the Furious destroyed. inital stages of the battle were ineffective. For the Furious this was caused in part because of the employment of the SEDIS and in part by the superior shielding possessed by the Rosenante Class Starship.
However, Saleke had a trick up his sleeve. Earlier, he had ordered the modification of five quantum torpedoes so that they were equipped with a Phased Claoking Device. These torpedoes when launched against the Rosenante ignored her shileds and caused significant damage to the latter vessel's Environmental Subsystems, lifeboats, secondary phaser array, forward tractor beam emitter and caused a hull breach in main Engineering. The advantage was short lived however, when Salid managed to deplete the Furious' forward shields enough to cause the vessel to veer off in order to avoid a volley of concussive photon torpedoes.
It was a manuever that would later become known as The Salid Gambit. With the Furious deviated from her pursuit. Salid managed to get the Rosenante into the Magnesite ore filled asteroid field in the Bardon system known as The Mill. It was an area familiar to Lieutenant Raschen, who had often used the area to avoid or lose Cardassian pursuit during the Cardassian-Federation War. Raschen had served in the Irregular Federation Forces during the Doentiz regieme, before defecting to the 52nd Fleet. His knowledge of the area would prove invaluable to evading the Furious. The high concentration of magnesite ore prevented the use of most navigational sensors withn the confines of the Mill, thus preventing the furious from following the Rosenante. in addition, coupled with the HISS Stealth System, the Furious was unable to detect the Rosenante from outside the field either.
Saleke ordered the Furious at best speed course around the field in the hopes of catching the Rosenante exitting the other side in the hopes of taking advantage of the Prometheus Class' Tri-vector assault mode. However, once on the other side, the furious detected the decaying signature left by the Spiral warp Drive of the ISS Rosenante.
Thinking that the Rosenante had already managed to clear the field and set course for Hexikor Prime, Saleke ordered the furious to pursue. Meanwhile the USS Rosenante remained in The Mill conducting repairs.
Act IV: Hexikor Prime
@@@ @ @@@ @@ @@@@@ @@@@ @@@@ @@ @@@@@ @@@@ @@@@ @@@@ @@@@@ @@@@@@@@ @@@ @@ @@@@@@@@@ @@@ @@@ @@@@@@@@@ @@@@@ @@@@@@ @@@@ @@@@@@ @@@@@@ @@@@@@@ @@@@@@@@@@@ @@@ @@@@@@ @@@@@@ @@@@@ @@@@@@@@@@@@ @@@@@@ @@@@@ @@@@@@@@@ @@@@@ @@@@@@@ @@@@@@ @@@@@@@ @@@@@@@ @@@@@ @@@@@ @@@@@@@@@@@@ @@@@@@@@ @@@@@@@ @@@@@@@@@@@@@ @@@@@@@ @@@@@@ @@@@ @@@@@@ @@@@@@@@ @@@@@@@@@@@@ @@@@@@@@ @@@@@ @@@@@@@@@@@@ @@@@@@@@@@@ @@@@@@@@@@@ @@@@@@ @@@@@@@@@@@@@@@ @@@@@@@ @@@@@@ @@@@@@@ @@@@@@ @@@@@@@@@@@ @@@@@@@@ @@@@@@ @@@@@@@@@ @@@@@@@@@ @@@@@@@ @@@@@@@@@@@ @@@@@@@@@@@ @@@@@@@ @@@@@@ @@@@@@@@@@@ @@@@@@@@@ @@@@@@@@ @@@@@@@@@@@@@@@@@@@@@@@@@ @@ @@@@@@@@@@ @@@@ @@@@@@ @@@@@@@@ @@@@@@@ @@@@@@ @@@@@@ @@@@@@ @@@@@@@@@@ @@@@@@ @@@@@@@@ @@@ @@@@@@@@ @@@@@ @@@@@@@ @@@@@ @@@@@@ @@@@@@ @@@@@@@@@ @@@@@@@@ @@@ @@@@@ @@@@@@@@@@ @@@ @@@@@@@@@@@@@ @@@@ @@@@@@@ @@@@@@ @@@@@@@@ @@@@ @@@@@@ @@@@@@@ @@@@@ @@@@@@@ @@ @@@@ @@@@@ @@ @
@@@ @ @@@ @@ @@@@@ @@@@ @@@@ @@ @@@@@ @@@@ @@@@ @@@@ @@@@@ @@@@@@@@ @@@ @@ @@@@@@@@@ @@@ @@@ @@@@@@@@@ @@@@@ @@@@@@ @@@@ @@@@@@ @@@@@@ @@@@@@@ @@@@@@@@@@@ @@@ @@@@@@ @@@@@@ @@@@@ @@@@@@@@@@@@ @@@@@@ @@@@@ @@@@@@@@@ @@@@@ @@@@@@@ @@@@@@ @@@@@@@ @@@@@@@ @@@@@ @@@@@ @@@@@@@@@@@@ @@@@@@@@ @@@@@@@ @@@@@@@@@@@@@ @@@@@@@ @@@@@@ @@@@ @@@@@@ @@@@@@@@ @@@@@@@@@@@@ @@@@@@@@ @@@@@ @@@@@@@@@@@@ @@@@@@@@@@@ @@@@@@@@@@@ @@@@@@ @@@@@@@@@@@@@@@ @@@@@@@ @@@@@@ @@@@@@@ @@@@@@ @@@@@@@@@@@ @@@@@@@@ @@@@@@ @@@@@@@@@ @@@@@@@@@ @@@@@@@ @@@@@@@@@@@ @@@@@@@@@@@ @@@@@@@ @@@@@@ @@@@@@@@@@@ @@@@@@@@@ @@@@@@@@ @@@@@@@@@@@@@@@@@@@@@@@@@ @@ @@@@@@@@@@ @@@@ @@@@@@ @@@@@@@@ @@@@@@@ @@@@@@ @@@@@@ @@@@@@ @@@@@@@@@@ @@@@@@ @@@@@@@@ @@@ @@@@@@@@ @@@@@ @@@@@@@ @@@@@ @@@@@@ @@@@@@ @@@@@@@@@ @@@@@@@@ @@@ @@@@@ @@@@@@@@@@ @@@ @@@@@@@@@@@@@ @@@@ @@@@@@@ @@@@@@ @@@@@@@@ @@@@ @@@@@@ @@@@@@@ @@@@@ @@@@@@@ @@ @@@@ @@@@@ @@ @
Act V: Kabor Prime
@@@ @ @@@ @@ @@@@@ @@@@ @@@@ @@ @@@@@ @@@@ @@@@ @@@@ @@@@@ @@@@@@@@ @@@ @@ @@@@@@@@@ @@@ @@@ @@@@@@@@@ @@@@@ @@@@@@ @@@@ @@@@@@ @@@@@@ @@@@@@@ @@@@@@@@@@@ @@@ @@@@@@ @@@@@@ @@@@@ @@@@@@@@@@@@ @@@@@@ @@@@@ @@@@@@@@@ @@@@@ @@@@@@@ @@@@@@ @@@@@@@ @@@@@@@ @@@@@ @@@@@ @@@@@@@@@@@@ @@@@@@@@ @@@@@@@ @@@@@@@@@@@@@ @@@@@@@ @@@@@@ @@@@ @@@@@@ @@@@@@@@ @@@@@@@@@@@@ @@@@@@@@ @@@@@ @@@@@@@@@@@@ @@@@@@@@@@@ @@@@@@@@@@@ @@@@@@ @@@@@@@@@@@@@@@ @@@@@@@ @@@@@@ @@@@@@@ @@@@@@ @@@@@@@@@@@ @@@@@@@@ @@@@@@ @@@@@@@@@ @@@@@@@@@ @@@@@@@ @@@@@@@@@@@ @@@@@@@@@@@ @@@@@@@ @@@@@@ @@@@@@@@@@@ @@@@@@@@@ @@@@@@@@ @@@@@@@@@@@@@@@@@@@@@@@@@ @@ @@@@@@@@@@ @@@@ @@@@@@ @@@@@@@@ @@@@@@@ @@@@@@ @@@@@@ @@@@@@ @@@@@@@@@@ @@@@@@ @@@@@@@@ @@@ @@@@@@@@ @@@@@ @@@@@@@ @@@@@ @@@@@@ @@@@@@ @@@@@@@@@ @@@@@@@@ @@@ @@@@@ @@@@@@@@@@ @@@ @@@@@@@@@@@@@ @@@@ @@@@@@@ @@@@@@ @@@@@@@@ @@@@ @@@@@@ @@@@@@@ @@@@@ @@@@@@@ @@ @@@@ @@@@@ @@ @
@@@ @ @@@ @@ @@@@@ @@@@ @@@@ @@ @@@@@ @@@@ @@@@ @@@@ @@@@@ @@@@@@@@ @@@ @@ @@@@@@@@@ @@@ @@@ @@@@@@@@@ @@@@@ @@@@@@ @@@@ @@@@@@ @@@@@@ @@@@@@@ @@@@@@@@@@@ @@@ @@@@@@ @@@@@@ @@@@@ @@@@@@@@@@@@ @@@@@@ @@@@@ @@@@@@@@@ @@@@@ @@@@@@@ @@@@@@ @@@@@@@ @@@@@@@ @@@@@ @@@@@ @@@@@@@@@@@@ @@@@@@@@ @@@@@@@ @@@@@@@@@@@@@ @@@@@@@ @@@@@@ @@@@ @@@@@@ @@@@@@@@ @@@@@@@@@@@@ @@@@@@@@ @@@@@ @@@@@@@@@@@@ @@@@@@@@@@@ @@@@@@@@@@@ @@@@@@ @@@@@@@@@@@@@@@ @@@@@@@ @@@@@@ @@@@@@@ @@@@@@ @@@@@@@@@@@ @@@@@@@@ @@@@@@ @@@@@@@@@ @@@@@@@@@ @@@@@@@ @@@@@@@@@@@ @@@@@@@@@@@ @@@@@@@ @@@@@@ @@@@@@@@@@@ @@@@@@@@@ @@@@@@@@ @@@@@@@@@@@@@@@@@@@@@@@@@ @@ @@@@@@@@@@ @@@@ @@@@@@ @@@@@@@@ @@@@@@@ @@@@@@ @@@@@@ @@@@@@ @@@@@@@@@@ @@@@@@ @@@@@@@@ @@@ @@@@@@@@ @@@@@ @@@@@@@ @@@@@ @@@@@@ @@@@@@ @@@@@@@@@ @@@@@@@@ @@@ @@@@@ @@@@@@@@@@ @@@ @@@@@@@@@@@@@ @@@@ @@@@@@@ @@@@@@ @@@@@@@@ @@@@ @@@@@@ @@@@@@@ @@@@@ @@@@@@@ @@ @@@@ @@@@@ @@ @
Act VI: Finale
@@@ @ @@@ @@ @@@@@ @@@@ @@@@ @@ @@@@@ @@@@ @@@@ @@@@ @@@@@ @@@@@@@@ @@@ @@ @@@@@@@@@ @@@ @@@ @@@@@@@@@ @@@@@ @@@@@@ @@@@ @@@@@@ @@@@@@ @@@@@@@ @@@@@@@@@@@ @@@ @@@@@@ @@@@@@ @@@@@ @@@@@@@@@@@@ @@@@@@ @@@@@ @@@@@@@@@ @@@@@ @@@@@@@ @@@@@@ @@@@@@@ @@@@@@@ @@@@@ @@@@@ @@@@@@@@@@@@ @@@@@@@@ @@@@@@@ @@@@@@@@@@@@@ @@@@@@@ @@@@@@ @@@@ @@@@@@ @@@@@@@@ @@@@@@@@@@@@ @@@@@@@@ @@@@@ @@@@@@@@@@@@ @@@@@@@@@@@ @@@@@@@@@@@ @@@@@@ @@@@@@@@@@@@@@@ @@@@@@@ @@@@@@ @@@@@@@ @@@@@@ @@@@@@@@@@@ @@@@@@@@ @@@@@@ @@@@@@@@@ @@@@@@@@@ @@@@@@@ @@@@@@@@@@@ @@@@@@@@@@@ @@@@@@@ @@@@@@ @@@@@@@@@@@ @@@@@@@@@ @@@@@@@@ @@@@@@@@@@@@@@@@@@@@@@@@@ @@ @@@@@@@@@@ @@@@ @@@@@@ @@@@@@@@ @@@@@@@ @@@@@@ @@@@@@ @@@@@@ @@@@@@@@@@ @@@@@@ @@@@@@@@ @@@ @@@@@@@@ @@@@@ @@@@@@@ @@@@@ @@@@@@ @@@@@@ @@@@@@@@@ @@@@@@@@ @@@ @@@@@ @@@@@@@@@@ @@@ @@@@@@@@@@@@@ @@@@ @@@@@@@ @@@@@@ @@@@@@@@ @@@@ @@@@@@ @@@@@@@ @@@@@ @@@@@@@ @@ @@@@ @@@@@ @@ @ @@@ @ @@@ @@ @@@@@ @@@@ @@@@ @@ @@@@@ @@@@ @@@@ @@@@ @@@@@ @@@@@@@@ @@@ @@ @@@@@@@@@ @@@ @@@ @@@@@@@@@ @@@@@ @@@@@@ @@@@ @@@@@@ @@@@@@ @@@@@@@ @@@@@@@@@@@ @@@ @@@@@@ @@@@@@ @@@@@ @@@@@@@@@@@@ @@@@@@ @@@@@ @@@@@@@@@ @@@@@ @@@@@@@ @@@@@@ @@@@@@@ @@@@@@@ @@@@@ @@@@@ @@@@@@@@@@@@ @@@@@@@@ @@@@@@@ @@@@@@@@@@@@@ @@@@@@@ @@@@@@ @@@@ @@@@@@ @@@@@@@@ @@@@@@@@@@@@ @@@@@@@@ @@@@@ @@@@@@@@@@@@ @@@@@@@@@@@ @@@@@@@@@@@ @@@@@@ @@@@@@@@@@@@@@@ @@@@@@@ @@@@@@ @@@@@@@ @@@@@@ @@@@@@@@@@@ @@@@@@@@ @@@@@@ @@@@@@@@@ @@@@@@@@@ @@@@@@@ @@@@@@@@@@@ @@@@@@@@@@@ @@@@@@@ @@@@@@ @@@@@@@@@@@ @@@@@@@@@ @@@@@@@@ @@@@@@@@@@@@@@@@@@@@@@@@@ @@ @@@@@@@@@@ @@@@ @@@@@@ @@@@@@@@ @@@@@@@ @@@@@@ @@@@@@ @@@@@@ @@@@@@@@@@ @@@@@@ @@@@@@@@ @@@ @@@@@@@@ @@@@@ @@@@@@@ @@@@@ @@@@@@ @@@@@@ @@@@@@@@@ @@@@@@@@ @@@ @@@@@ @@@@@@@@@@ @@@ @@@@@@@@@@@@@ @@@@ @@@@@@@ @@@@@@ @@@@@@@@ @@@@ @@@@@@ @@@@@@@ @@@@@ @@@@@@@ @@ @@@@ @@@@@ @@ @


